

Build a Simple Webpack/React App
What is Webpack?
-
Webpack is a module bundler.
-
Webpack can take care of bundling alongside a separate task runner.
React, and Hot Module Replacement (HMR) helped to popularize webpack and led to its usage in other environments, such as Ruby on Rails.
Despite its name, webpack is not limited to the web alone. It can bundle with other targets as well, as discussed in the Build Targets chapter.
We will retrieve data via the star wars api. We will have 7 components.
-
• PeopleList is a list of PeopleItem
-
• StarshipList is a list of StarshipItem
-
• PlanetList is a list of PlanetItem
-
• PeopleItem is a Each individual person
-
• StarshipItem is a Each individual starship.
-
• PlanetItem is a Each individual planet.
-
• Nav is a the navigation bar, that will be responsible for routing.
Things to know about what is going on underneath the hood.
-
• webpack is responsible for a module bundler, can bundle any asset or resource.
-
• webpack-cli is responsible for providing a flexible set of commands run your bundler.
-
• webpack-dev-server is responsible for utilizing webpack with a development server for live reloading.
-
• @babel/core is responsible for enables all configurations for your babel compiler.
-
• @babel/preset-env is responsible for compiles es6 code into es5.
-
• @babel/preset-react is responsible for compiles jsx to javascript.
-
• babel-loader is responsible for loading our javascript file, which will compile code based on the presets in the .babelrc file.(Which we would create later in the tutorial.)
-
• html-webpack-plugin is responsible for the html file that serves your webpack bundle. Can let it generate a html file for you or can use lodash template. In this case we will generate a html file.
-
• css-loader is responsible for loading file with style-loader, compiles @import and url like import/require.
-
• style-loader is responsible for injecting styles as a style tag.
Then we will install our dependencies.
-
• react enables the user of react library.
-
• react-dom enables rendering our app component on our root id in our html file.
-
• react-router-dom enables your routing for your app.
-
• history enables history for your navigation of your route.
mkdir StarWarsApp
cd StarWarsApp
npm init -y #Create your package.json with your default options.
#npm i -D for installing your devDependencies.
npm i -D webpack webpack-cli webpack-dev-server @babel/core @babel/preset-env @babel/preset-react babel-loader html-webpack-plugin css-loader style-loader
#npm i -S for install your dependencies
npm i -S react react-dom react-router-dom history
We will create a .babelrc, and webpack.config.js file within our root directory.
.babelrc — configures your babel compiler, in this case we will use a presets property to compile specific versions of javascript.
webpack.config.js — configures your webpack bundler.
touch .babelrc webpack.config.js
Now we will create a src and dist directory, and within your src directory we will have a styles and components folder.
mkdir src dist
#Go into your src directory, and create a styles and components folder.
cd src
mkdir components styles
touch index.js index.html
We will first configure our package.json, we will add a start and build script. When building your webpack bundle, you will have a start script with a — mode indicating if it is development, or production. Then in the case of development we would add the — watch flag to watch the package.json.
Our start script is for our development server, and our build script is our production server.
{
  "name": "StarWarsApp",
  "version": "1.0.0",
  "description": "",
  "main": "index.js",
  "scripts": {
    "test": "echo \"Error: no test specified\" && exit 1",
    "start": "webpack --mode development --watch",
    "build": "webpack --mode production"
  },
  "keywords": [],
  "author": "",
  "license": "ISC",
  "devDependencies": {
    "@babel/core": "^7.1.2",
    "@babel/preset-env": "^7.1.0",
    "@babel/preset-react": "^7.0.0",
    "babel-loader": "^8.0.4",
    "css-loader": "^1.0.0",
    "html-webpack-plugin": "^3.2.0",
    "style-loader": "^0.23.1",
    "webpack": "^4.20.2",
    "webpack-cli": "^3.1.2",
    "webpack-dev-server": "^3.1.9"
  },
  "dependencies": {
    "react": "^16.5.2",
    "react-dom": "^16.5.2",
    "react-router-dom": "^4.3.1"
  }
}
Feel free to look at github gist if you would like to look at the code.
In our webpack.config.js we will first import the modules we need. We will first import your path, which will join your app directory path with the src directory. Then we will import your html-webpack-plugin for initiating your bundle in a html file. Which would be set to the plugins property of the object you are exporting.
//import your path module for joining paths with your main directory.
const path = require('path');

//then import your webpack plugin, so you can now bundle your file in your html file.
const htmlPlugin = require('html-webpack-plugin');
Feel free to look at github gist if you would like to look at the code.
Define the object your will exporting from your configuration file. It will contain 4 properties.
-
• entry which would be where your ReactDOM will be initialized.
-
• output which would be where your distribution files would be in. It will contain a filename, and path property. The filename is the name of the file which all your files would be bundled in which would be index.bundle.js. Then path is where your bundled files would be in, which would be the dist folder.
-
• module which would contain a rules array which would contain object that each one will have at least a test property(the regex pattern to which files would be loaded), and loader(the loader or loaders that will load your files based on test property).
-
• plugin which would be where you initiate any plugins for you webpack configuration. In which we would use html-template-plugin to create a file which would reference index.bundle.js.
//Now define the object your are exporting, that will be used by webpack to bundle your files.
module.exports = {
    //Define your properties
    //-entry property is the entry file where your app would be registered or where the react-dom is initialized.
    //-output property is the output file where your app bundles directory would be set, and where your files would be bundled at.
    //-module property is where all your rules would be set, for your loaders.
    entry: path.join(__dirname, '/src/index.js'),
    output: {
        //The directory where your index.html file is being created in.
        path: path.join(__dirname, '/dist'),
        //Define the bundle file where all your files would be bundled in.
        filename: 'index.bundle.js'
    },
    module: {
        //You rules property would contain all your rules for yoour loaders.
        rules: [
            //Each item would contain a test property which would be regex indicating what files to compile.
            {
                test: /\.(js|jsx)/,
                //WOuld exclude node-Modules from being loaded.
                exclude: /node_modules/,
                //You would have this loaded by babel.
                //You would also have a options object with it's cacheDirectory property set true.
                options: {
                    cacheDirectory: true,
                },
                loader: 'babel-loader'
            },
            //We can also load css files.
            //No need for a exclude property or options.
            {
                test: /\.css/,
                loader: [
                    'style-loader',
                    'css-loader'
                ]
            }
        ]
    },
    //Now define your array property where you would initialize your webpack plugin.
    plugins: [
        new htmlPlugin({
            //Have your url of your index.html'
            template: './src/index.html'
        })
    ]
}
Feel free to look at github gist if you would like to look at the code.
Now define your .babelrc which will hold your configuration for your babel compiler. We would only define our presets property with our preset-env and preset-react module.
{
  "presets": [
    "@babel/preset-env",
    "@babel/preset-react"
  ]
}
Feel free to look at github gist if you would like to look at the code. Now we will go to our index.html file in our src folder.
<!DOCTYPE html>
<html lang="en">
<head>
    <meta charset="UTF-8">
    <meta name="viewport" content="width=device-width, initial-scale=1.0">
    <meta http-equiv="X-UA-Compatible" content="ie=edge">
    <title>Star Wars App</title>
    <base href="/" />
</head>
<body>
    <!---Define the div that will render the virtual dom.-->
    <div id="root">

    </div>
</body>
</html>
Feel free to look at github gist if you would like to look at the code.
Define your index.js which would be where entry point of the virtual dom would be configured. We will retrieve the App component from the ./components/App which has not be defined yet. Then import React, and the render method from react-dom that will render your App component in your virtual dom, which will be set to element with a id of root.
//import React
import React from 'react';
//import the named export called render from react-dom that will render your virtual dom.
import { render } from 'react-dom';
//import your app component from your app.js file in your components folder.
import App from './components/App';

render(<App />, document.getElementById("root"));
Feel free to look at github gist if you would like to look at the code.
Now lets create your App component which would be set to your app. Create a App.js file in your components folder. And a App.css file in your styles folder.
cd components
touch App.js
mkdir presentational container
cd ..
cd styles
touch App.css
You app component will have just a div, and another div which will hold your content. We will use PureComponent instead of Component to perform a shallow comparison of props and state.
import React, { PureComponent } from 'react';
//import your styles
import '../styles/App.css';

export default class App extends PureComponent {
    render() {
        return (
            <div className="app">
                <h2 className="app-title">Star Wars App</h2>
                <div className="content">

                </div>
            </div>
        )
    }
}
Feel free to look at github gist if you would like to look at the code.
Now define the styles for your App component.
.app {
    display: flex;
    flex-direction: column;
    justify-content: space-between;
    margin-right: auto;
    margin-left: auto;
    width: 80%;
}
.app-title {
    width: 100%;
    /*Have your font weight be 800 and have it be color of gold.*/
    font-weight: 800;
    color: gold;
    padding-left: 20px;
    font-family: -apple-system, BlinkMacSystemFont, 'Segoe UI', Roboto, Oxygen, Ubuntu, Cantarell, 'Open Sans', 'Helvetica Neue', sans-serif;
}
.content {
    width: 101.2%;
    background: black;
    margin: 0;
    padding: 0;
}
Feel free to look at github gist if you would like to look at the code. Now run npm start, it should bundle your file. Your dist directory should look like this.
But we would like our app to hot reload, so in our package.json. Let’s just replace the start script with a webpack-dev-server — mode development, then to have it open via -open flag, so your app opens when your dev server starts and a -hot flag to indicate it is hot reloading.
{
  "name": "StarWarsApp",
  "version": "1.0.0",
  "description": "",
  "main": "index.js",
  "scripts": {
    "test": "echo \"Error: no test specified\" && exit 1",
    "start": "webpack-dev-server --mode development --hot --open chrome",
    "build": "webpack --mode production"
  },
  "keywords": [],
  "author": "",
  "license": "ISC",
  "devDependencies": {
    "@babel/core": "^7.1.2",
    "@babel/preset-env": "^7.1.0",
    "@babel/preset-react": "^7.0.0",
    "babel-loader": "^8.0.4",
    "css-loader": "^1.0.0",
    "html-webpack-plugin": "^3.2.0",
    "style-loader": "^0.23.1",
    "webpack": "^4.20.2",
    "webpack-cli": "^3.1.2",
    "webpack-dev-server": "^3.1.9"
  },
  "dependencies": {
    "react": "^16.5.2",
    "react-dom": "^16.5.2",
    "react-router-dom": "^4.3.1"
  }
}
Feel free to look at github gist if you would like to look at the code.
We will first define our list component, and styles. We will create a PeopleList.js, StarshipList.js, and PlanetList.js file. Instead of making styles for each component, we will just create a List.css for all of our list styles. (NOTE: Our routes would be set to each of these components.
cd components/container
touch PeopleList.js StarshipList.js PlanetList.js
cd ../..
cd styles
touch List.css
In each of our List components, we will have a div and inner div, and have your elements loop through it. We would have a data array in our state. In our componentDidMount we would fetch data, with a options object specifying our ajax call is a get method. So for our PeopleList component we will retrieve data using the componentDidMount method, and using es6 fetch api. In our fetch api we will pass a option with a method property set to GET indicating it is a get request. We will conditionally render the data array from state that will be set to the data of the response.
import React, { PureComponent } from 'react';
//import styles for each list componet.
import '../../styles/List.css';

export default class PeopleList extends PureComponent {
    constructor() {
        super();
        this.state = {
            data: []
        }
    }
    componentDidMount() {
        //Fetch your people endpoint from swapi api, and then pass a object with a method property set to get indicating it is a get request.
        fetch("https://swapi.dev/api/people", {
            method: "GET"
            //Resolve your promise, and convert the response to json.
        }).then(res => res.json())
        //After converting to json then set the data state to the results property of the response.
        .then(resJson => {
            this.setState({data: resJson.results});
        });
    }
    render() {
        return (
            <div className='container'>
                <div className="route-title">
                    <h3>Starwars People</h3>
                </div>
                <div>
                    {/*If the data array has values based on if it contains one item which would be truthy.
                     Render it. */}
                    {this.state.data.length
                    ? this.state.data.map((person, i) => <p key={i}>{person.name}</p>)
                    : null}
                </div>
            </div>
        );
    }
}
Feel free to look at github gist if you would like to look at the code.
Now follow the same pattern for your PlanetList and Starship component, with their respective endpoint. Here is swapi if you want to play with the api.
import React, { PureComponent } from 'react';
// import styles for list
import '../../styles/List.css';

export default class StarshipList extends PureComponent {
    constructor() {
        super();
        this.state = {
            data: []
        }
    }
    //Define your componentDIdMount that will responsible for retrieving data.
    componentDidMount() {
        //Use fetch api used to retrieve data for starships, and pass a object with a method property set to GEt indicating it is a Get request.
        fetch("https://swapi.dev/api/starships", {
            method: "GET"
            //THen convert the response to json.
        }).then(res => res.json())
        //THen set the state of the data to the results.
        .then(resJson => this.setState({data: resJson.results}));
    }
    render() {
        return (
            <div className="container">
                <div className="route-title">
                    <h3> Starships</h3>
                </div>
                <div>
                    {/*Map over the data array if it has data, and if it contains data it will be truthy */}
                    {this.state.data.length ?
                        this.state.data.map((starship, i) => <p key={i}>{starship.name}</p>)
                    : null}
                </div>
            </div>
        )
    }
}
Feel free to look at github gist if you would like to look at the code.
import React, { PureComponent } from 'react';
// import styles for llst
import '../../styles/List.css';

export default class PlanetList extends PureComponent {
    constructor() {
        super();
        this.state = {
            data: []
        }
    }
    // Define your componentDidMOunt that is responsible for retrieving data.
    componentDidMount() {
        //Use fetch api to get data for your planets using swapi planet api url, and pass a options with a property called method with a value of GET
        //indicating it is a Get request.
        fetch("https://swapi.dev/api/planets", {
            method: "GET"
            //COnvert the response to json.
        }).then(res => res.json())
        //Now set the state of the data.
        .then(resJson => this.setState({data: resJson.results}));
    }
    render() {
        return (
            <div className="container">
                <div className="route-title">
                    <h3>Planets</h3>
                </div>
                <div>
                    {/* If your data array has data map over the array */}
                    {this.state.data.length ?
                        this.state.data.map((planet, i) => <p key={i}>{planet.name}</p>)
                    : null}
                </div>
            </div>
        );
    }
}
Feel free to look at github gist if you would like to look at the code.
Now we will import each component to the App.js to see if the ajax requests are successful.
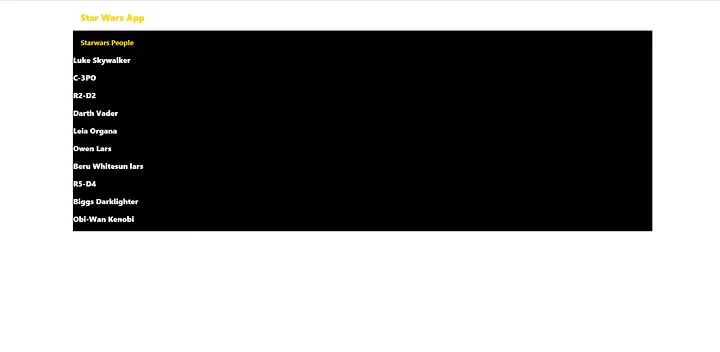
Here is the PeopleList
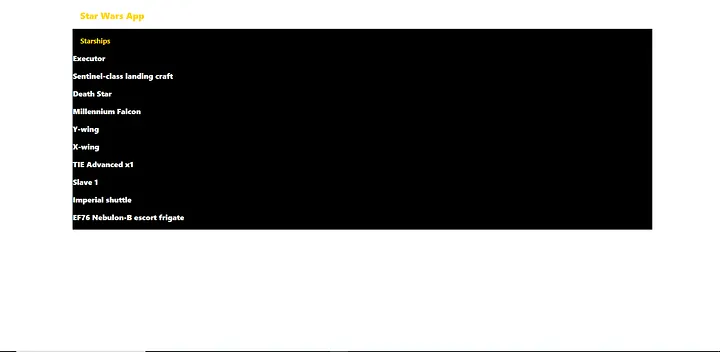
Here is the StarshipList
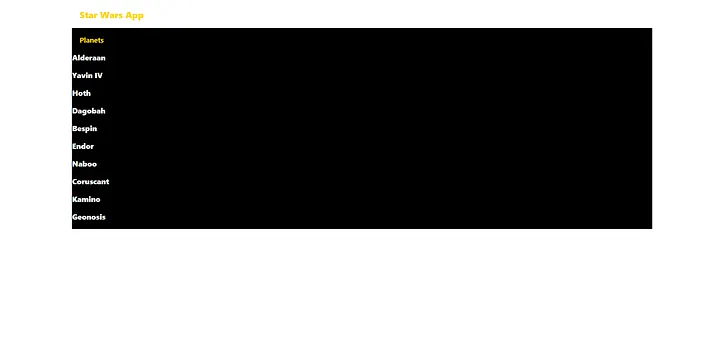
 Here is the PlanetList
Great we will configure our Routes.
Now let’s define our routes, we will create a Routes.js file which will hold our routes in the root of our src directory.
cd ../../..
touch Routes.js
In our Routes.js file, we will import the Switch and Route component. The Switch component will go to the first component that matches the intended route. Our routes will be / which would be using the exact keyword. Then would /people, /planet, and /starship for intended list components. We will create a Home component for our home route (/).
import React, { PureComponent } from 'react';
//import styles
import '../../styles/App.css';

export default class Home extends PureComponent {
    render() {
        return (
            <div>
                <div className="route-title">
                    <h3>Home</h3>
                </div>
                <div>
                    N/A
                </div>
            </div>
        )
    }
}
Feel free to look at github gist if you would like to look at the code.
Here are Routes.js file.
//import react since you are using react components.
import React from 'react';
// import componnets needed for react-router-dom
import { Switch, Route } from 'react-router-dom';
//import the component needed for your routes.
import Home from './Home';
import PeopleList from './PeopleList';
import PlanetList from './PlanetList';
import StarshipList from './StarshipList';


export default (
    <Switch>
        <Route exact path='/' component={Home} />
        <Route path='/people' component={PeopleList} />
        <Route path='/planets' component={PlanetList} />
        <Route path='/starships' component={StarshipList} />
    </Switch>
)
Feel free to look at github gist if you would like to look at the code.
Now we will go configure our Router in our index.js file in within our src folder. We will be using BrowserRouter and alias as R when we import it, and nest our App component.
//import React
import React from 'react';
//import the named export called render from react-dom that will render your virtual dom.
import { render } from 'react-dom';
//import your app component from your app.js file in your components folder.
import App from './components/App';
//import your BrowserROuter from react-router-dom to configure your app's routes.
import {BrowserRouter as R} from 'react-router-dom';

render(<R><App /></R>, document.getElementById("root"));
Feel free to look at github gist if you would like to look at the code.
Now define our Navbar component to navigate to each page, it will be in our presentational folder, and the function used to navigate to the route will be passed down from the App component.
import React from 'react';

//Define navbar component responsible for routing throughout application.
function Navbar(props) {
    return (
        <nav>
            <button onClick={e => props.navigate(e, '/')}>
                <h3>Home</h3>
            </button>
            <button onClick={e => props.navigate(e, '/people')}>
                <h3>People</h3>
            </button>
            <button onClick={e => props.navigate(e, '/planets')}>
                <h3>Planets</h3>
            </button>
            <button onClick={e => props.navigate(e, '/starships')}>
                <h3>Starships</h3>
            </button>
        </nav>
    );
}

export default Navbar;
Feel free to look at github gist if you would like to look at the code. Update styles for navbar and title for each route in the app.css.
.app {
    display: flex;
    flex-direction: column;
    justify-content: space-between;
    margin-right: auto;
    margin-left: auto;
    width: 80%;
    /*Have your app has display grid*/
    /* display: grid; */
    /*It would have 3 columns of 10% 80% 10%*/
    /* grid-template-columns: 10% 80% 10%; */
}
.app-title {
    width: 100%;
    /*Have your font weight be 800 and have it be color of gold.*/
    font-weight: 800;
    color: gold;
    padding-left: 20px;
    font-family: -apple-system, BlinkMacSystemFont, 'Segoe UI', Roboto, Oxygen, Ubuntu, Cantarell, 'Open Sans', 'Helvetica Neue', sans-serif;
}
.route-title {
    width: 100%;
    /*Have your font weight be 800 and have it be color of gold.*/
    font-weight: 800;
    color: gold;
    padding-left: 20px;
    font-family: -apple-system, BlinkMacSystemFont, 'Segoe UI', Roboto, Oxygen, Ubuntu, Cantarell, 'Open Sans', 'Helvetica Neue', sans-serif;
}
.content {
    /* Have your content div to a grid-column of 2/2, and have your width to 100% */
    grid-column: 2/2;
    width: 100%;
    background: black;
}

nav {
    width: 100%;
    height: 15%;
    background-color: black;
    margin-bottom: 5%;
    padding: 10px;
    color: gold;
}

nav > button {
    background: transparent;
    color: gold;
    border: none;
    border-radius: 15%;
}

nav > button:hover {
    background: gold;
    color: black;
}
Feel free to look at github gist if you would like to look at the code. Finally import the withRouter from react-router-dom, Routes, and Navbar component to the App.js file, and bind the navigate function in the constructor of the class.
import React, { PureComponent } from 'react';
//import withRouter to encapsulate App component with react-router-dom history props.
import { withRouter } from 'react-router-dom';
//import your styles
import '../styles/App.css';
//Navbar used to navigate to specific routes based on the path argument.
//Bind navigate function in component.
import Navbar from './presentational/Navbar';
//Import where routes will be rendered.
import Routes from '../Routes';

class App extends PureComponent {

    constructor() {
        super();
        this.state = {};
        this.navigate = this.navigate.bind(this);
    }

    navigate(e, path) {
        e.preventDefault();
        this.props.history.push(path);
    }

    render() {
        return (
            <div className="app">
                <h2 className="app-title">Star Wars App</h2>
                <Navbar navigate={this.navigate} />
                <div className="content">
                    {Routes}
                </div>
            </div>
        )
    }
}

export default withRouter(App);
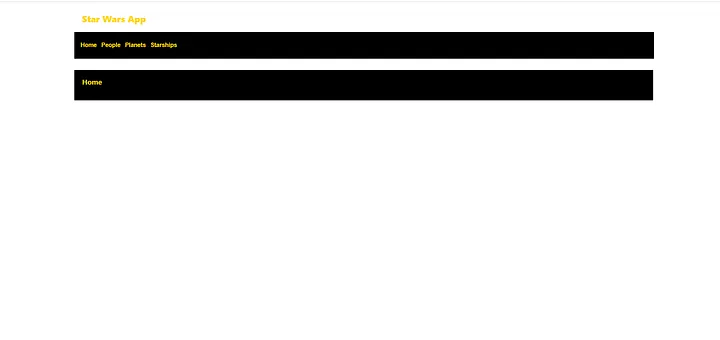
Feel free to look at github gist if you would like to look at the code. Now the navigation bar should route each page.
The home page.
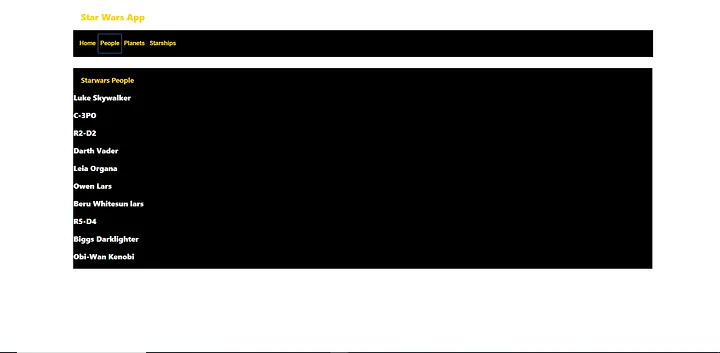
The people list page.
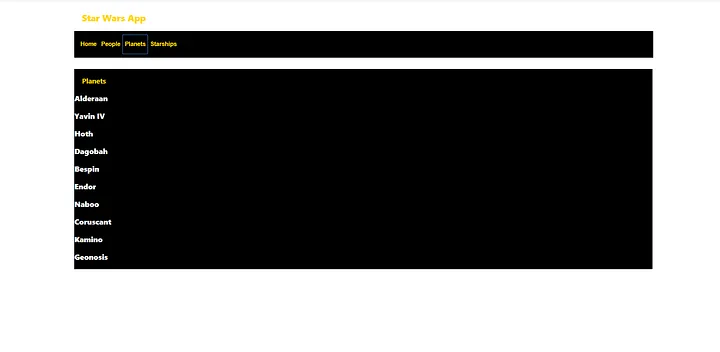
The planets list page.
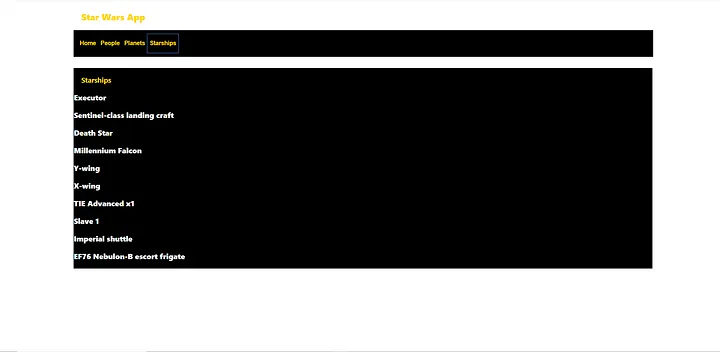
The star ship list page.
This is a very basic setup of a webpack project. Use this as a starting point, add a route for each person, planet and star ship.
Here is the github repository as a reference: Feel free to look at source code if you would like to look at the code.